How to Start a Family Travel Blog in 2019

Disclosure: This post may contain affiliate links. I may earn commission from purchases made through these links at no additional cost to you.
 Have you been itching to know how to start a family travel blog?
Pretty sure you’ve been reading a lot of travel blogs – for family travelers, large families, small families, families with babies, solo travelers, adventure travelers, backpackers, budget travelers, luxury travelers, and a gazillion others – including this one.
When I started investing on this blog, I didn’t think it would become a travel blog again, because I wanted it to be more of a mommy blog. But alas, things change and priorities shift and here we are now.
There are plenty of reasons why you might want to create a travel blog, and money might be a particularly strong motivation, I’m sure. However, you might also be travel blogging because you want to preserve your memories, keep family updated, or just want to share to the whole world the awesome things you’ve done – in the hopes that they can use the info there as well.
Regardless of your reason, it cannot be denied that a lot of travel bloggers now make their living through their platforms, especially if they regard blogging as a business right from the start, and I couldn’t blame you for wanting to get on board.
Personally, I don’t earn much from this family travel blog (yet), but have gotten full-time income from it indirectly. How? In the beginning, I used it as a platform to showcase my portfolio and writing samples when I was starting out as a freelance writer. Nowadays, my experience from this blog (and my other blogs) is how I am able to deliver digital marketing services to my clients.
But let’s focus more on the bigger travel bloggers. Perhaps you’d want even more inspiration? These are just some of the awesome people I know who earn a huge sum from their travel blogs – and their figures.
- Amy from Wherever Writer – $3,500+
- Rae and Jason from Getaway Couple – $3,500+
- Jeremy and Angie from Living the Dream – $6,000+
- Lia and Christina from Slaying Social – $10,000+ (these reports are from Lia’s travel blog, Practical Wanderlust)
- Mar from Once in a Lifetime Journey – $14,000+
- Michael and Helene from Helene in Between – $15,000+
- Tom and Anna from Adventure in You – $15,000+
- Esther and Jacob from Local Adventurer – $17,000+
- Reese Family from It’s a Lovely Life – $190,000+
- …and many more!
Now, do take note that these bloggers make money from their blogs in many different ways. You simply can’t have all your eggs in one basket!
Some of them get income from affiliate marketing, sponsored posts, ambassadorship, their own products and services, and many others – or a combination of all! Regardless of where they get their income, the most important part is that they actually got started their blog.
And the best news about putting together a travel blog is that you don’t need to be techie at all. Even if you have zero experience doing these things, it should take you around 10 minutes to get things set up (as long as you’re done with the brainstorming part, that is).
Okay. So, are you ready to go ahead and get learn how to set up a travel blog?
1. Brainstorm your niche
Before you do anything else, I think the most important thing that you need to sort out is determining the niche of your brand new blog.
What do you want to talk about?
Well, since you’re here, you’ve probably thought of starting a travel blog…but you also have to keep in mind that the travel niche is already saturated. If you create one that’s like everyone else’s, it will be hard for you to stand out from the crowd.
Come up with a unique angle for your travel blog.
For example, ours is on the family travel subcategory, and we further narrow it down to specialize in adventure travel (think camping, hiking, backpacking) and (currently) limited to the Philippines. Of course, we have plans to expand that a little bit more, when we start traveling outside of the country and we decide to expand our travel budget together with that.
Even as you narrow down your niche, you might find that you still have similar websites to what you have in mind – don’t worry too much about it now, because then that’s how you use your uniqueness to let your content and brand shine through. Yay!
2. Secure your domain
Now that you’ve figured out your niche, it’s time to come up with a domain name.
A domain name is basically the address of your blog or website. In this case, our domain is heymissadventures.com.
You can choose to go for domain names with a .net or .co in the end (some types are cheaper than others) but a .com is the most popular and thus, the most recommended of all.
When coming up with a domain name, there are two routes you can take:
- get a keyword-rich one (eg. familytravel.com, familyhiking.com), because it increases your chances of getting the top spot in Google for your chosen keyword, or
- get one that is easiest to brand (eg. google.com, yahoo.com, gmail.com), because they are unique and memorable
Personally, I would suggest going for the second route. Make sure to keep it unique and easy to remember – around 2-3 words is a good rule of thumb.
You might also want to make sure that your domain’s potential social media channels are available. You can use Namecheckr to quickly check if the URL and social media channels (Facebook, Twitter, Pinterest, Instagram and YouTube are top priority) are not yet taken.
Once your new domain has checked all our criteria, it’s time to make the purchase.
I use Namecheap for most of my domains. They often provide discounts (my first year as at just $1 versus the regular $10/year) on their website. I also have not had any problem in the five years I’ve been using them.
3. Get your hosting
Now it’s time to purchase a hosting plan.
You might be wondering…do I really need it? Yes, of course! Your hosting plan is the lot where your house (blog) sits on, and if you just have your house standing on a free lot, you most likely will get evicted without warning. You don’t want that to happen!
Some bloggers use the same service for their domain and hosting but others have it separate, in case one of the services have problems. It’s totally up to you how you go about this.
Psst! Are you from the Philippines? You can get started with a family travel blog for just Php1,056 per year! Crazy cheap, right?
Among the most popular and highly recommended hosting platforms is Siteground. Why choose them?
- Siteground loads websites faster and can handle more traffic
- Siteground is safer and guards you from your neighbors
- Siteground has THE best customer service on the planet!
So, are you ready?
Here’s what you need to do next:
1. Choose a hosting plan

Siteground has three plans – StartUp, GrowBig and GoGeek. I recommend choosing the middle tier because you want to make sure you account for your blog’s growth. Plus, if you intend to start up other sites, you can use the same plan. Yay!
Note: When you choose the 1-, 2- or 3-year term plan, you get to lock in the price at 70% off. Plus you don’t have to worry about paying for your hosting for the next 1, 2 or 3 years! Make sure you grab that offer right away.
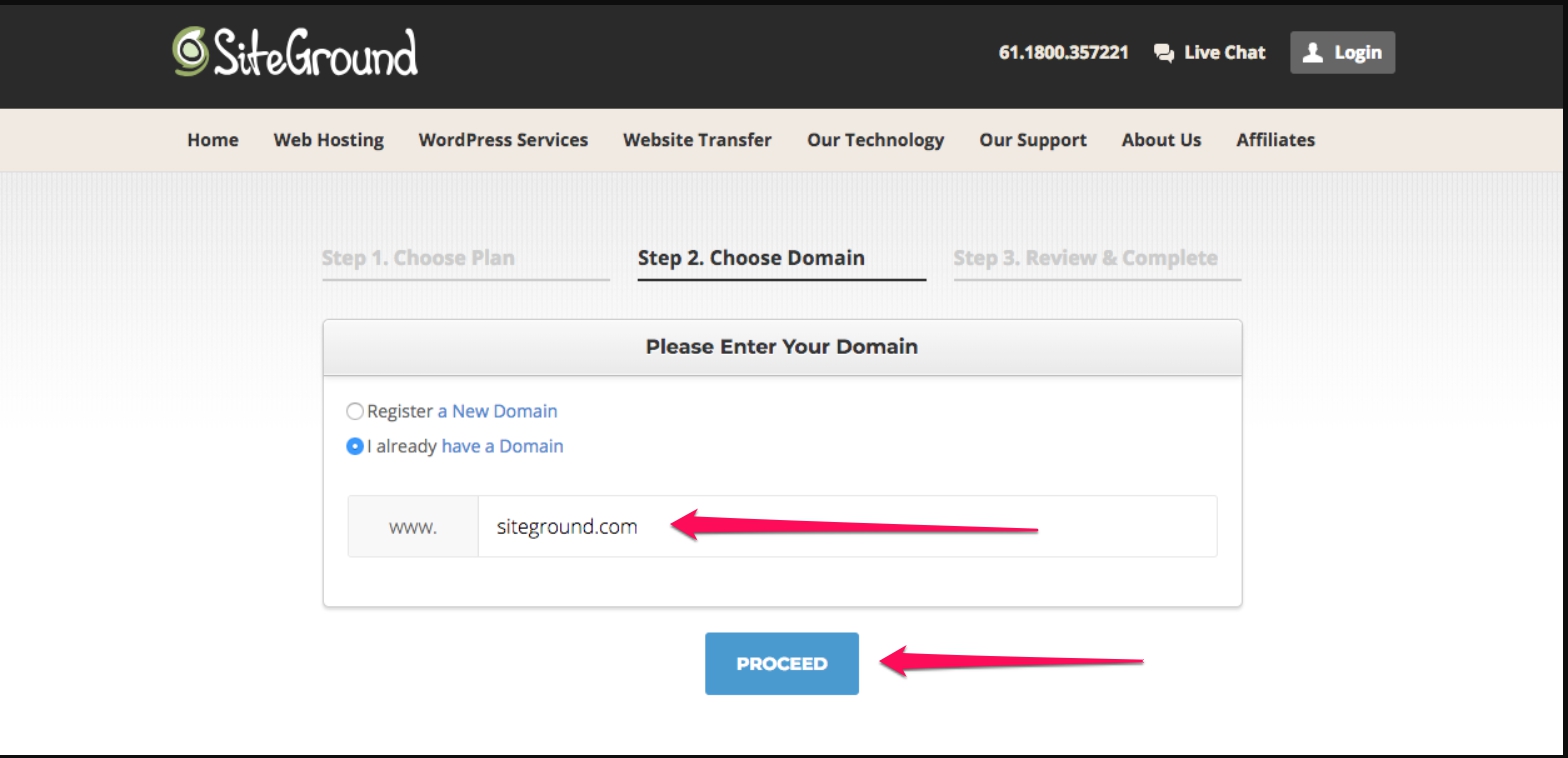
2. Enter your chosen domain
As mentioned, you can choose to either get your domain from another company (I use Namecheap for some of my domains and the others through my friends at CoffeeMags/Masaion) or get them from Siteground when you make your hosting plan purchase.
3. Review and complete your purchase
Review your purchase(s) and then pay.
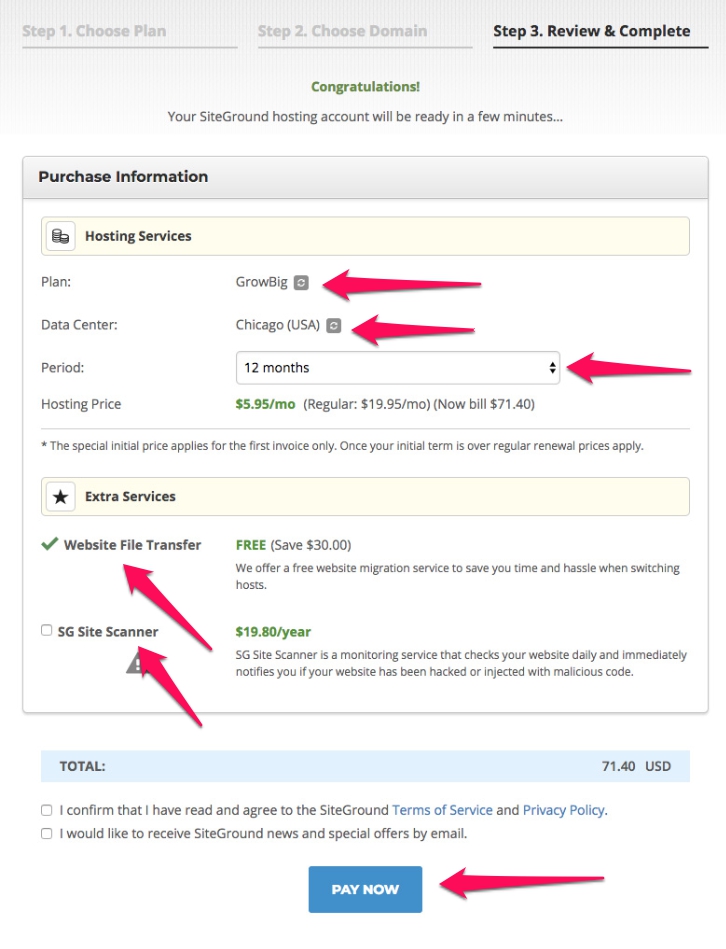
You can choose which Data Center to use for your site (this is extremely helpful especially if you have certain websites with a target market from another country other than where you are; make sure to choose a location closest to your target market).
Remember: Your discount only applies to your first invoice. So, if you get a 3-year hosting plan, that means you lock in the price for the next 3 years! Lock in that price today.
In case you have an existing website and want to migrate all your content to Siteground, they also offer free transfer to save you from all the headache.
You can also add in other extra services such as Domain Privacy, so your public information is hidden from the public, and the SG Site Scanner, so you can get notifications when your site gets hacked or infected.
4. Install WordPress
Although there are different blogging platforms available, WordPress is the industry standard. It powers around 75% million websites, or around 31% of all website all over the world.
There are three ways to install WordPress on your brand new website, but we’ll discuss the easiest of all, which is through Siteground’s installation wizard.
1. First, start a new website
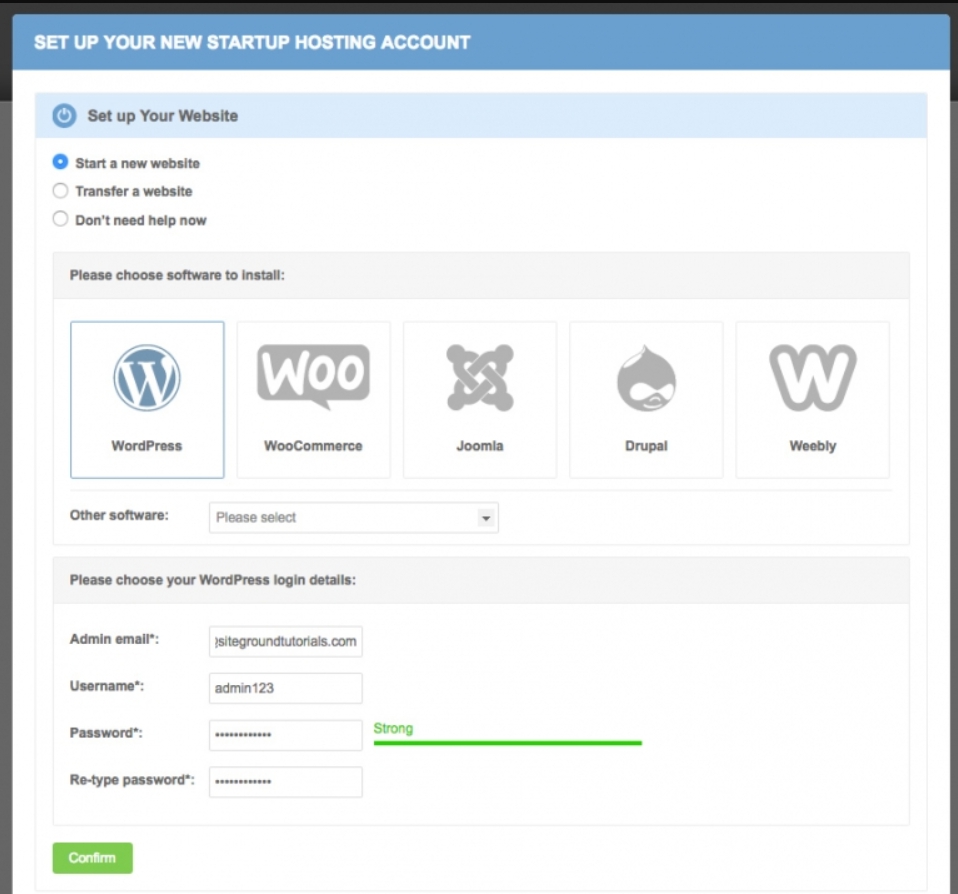
Choose the software your want to install. In this case, we use WordPress.
Then, enter your user details – email address, user name and password. This is what you will use to login to your WordPress dashboard.
2. Second, set up and choose enhancements
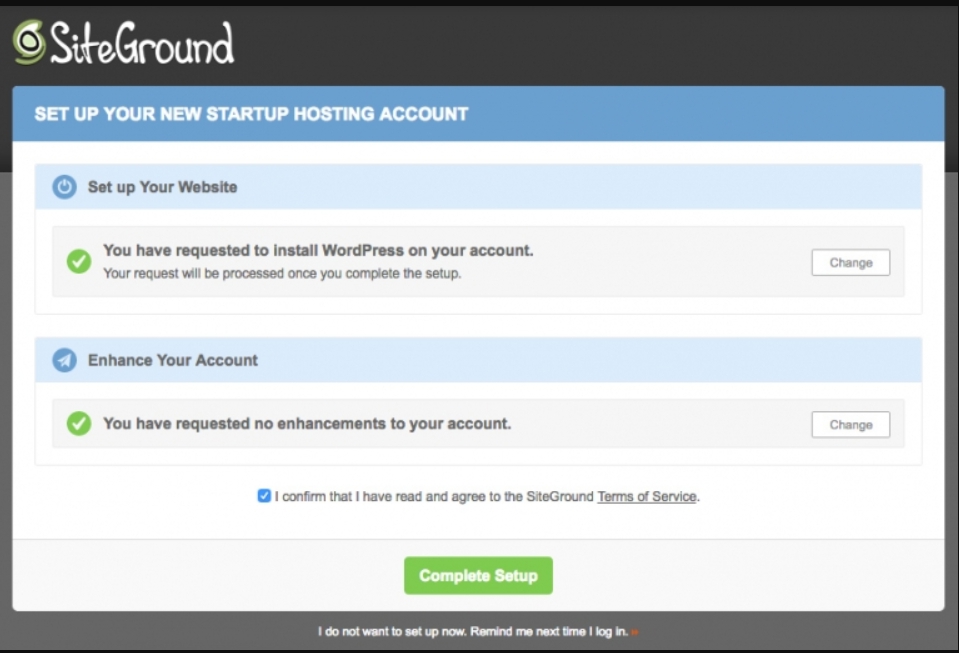
In case you want to add enhancements to your website, you can do so here. Otherwise,click on Complete Setup to proceed.
3. Now it’s ready to use
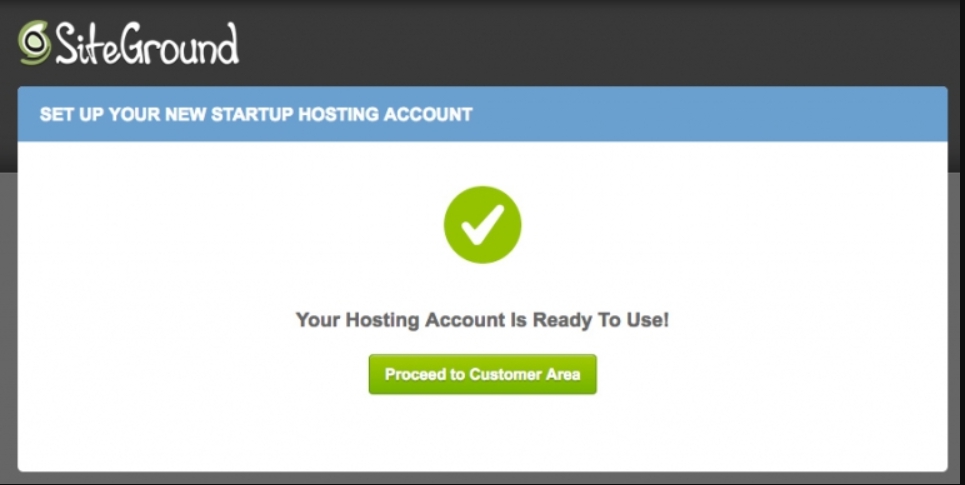
That’s it. Pretty simple, huh?
Another method for installing is through Softaculous, which also involves just a few clicks.
5. Pick a theme
A lot of beginner travel bloggers often make the mistake of spending hours and hours deciding which theme to use on their blogs. I know I once did.
There are a gazillion themes, free and paid, currently available in the market so it can be difficult to pinpoint just one.
Personally, I use Divi for all my websites. They come with templates and a drag and drop builder so even if you have zero design and coding knowledge, you can still have a stunning website that you can be proud of.
I’ve also had the privilege to use other themes for several of my clients, and among those that you can use are:
- Genesis theme (you will need to purchase a separate child theme for this one)
- Elementor plugin + OceanWP theme (used the free versions for both)
- Thrive Themes
- Bluchic Themes
It can be difficult to achieve the demo websites for the themes if you have zero tech knowledge, so just use the template and tweak it as needed.
6. Install useful plugins
It’s easy to get overwhelmed on WordPress plugins – there’s just too many of them!
Before you go and install one, think it over or read reviews and feedback to see if they are worth adding. Most of the times, these plugin features are already available in your website theme such as Divi or Thrive.
Below are my most recommended plugins when you for beginner bloggers:
- Akismet
- SEO by Yoast
- Wordfence
- UpdraftPlus Backup Plugin
- WP Super Cache
- Short Pixel
- Social Warfare
- Pretty Links
7. Add a logo
You can still run a spanking good travel blog without a fancy logo, so you can totally DIY this (like I did mine for all my websites) especially if you are short on funds.
These days, typography logos are the most common route to go. Be sure to keep in mind these typography pairings to help guide you.
To create your logo, you can use Photoshop or Canva.
8. Pick your colors and typography
I admit to taking so much time into this, but I find it extremely motivating to get a blog’s branding started.
To make things simpler, you can actually just choose the same typography that you used with your logo. However, if you chose a fancy font that is hard to read through when it’s clumped with several other words, you might have to opt for something simpler.
I recommend using Google fonts, as they are much easier to install and causes no compatibility problems when your site is being viewed from different browsers. You can also opt to find free fonts through various directories like DaFont, or purchase them there or through the designers themselves.
As for your brand colors, you can opt to have one main color and one secondary one, plus a color for your text. (I usually do not use black for my paragraph text colors, but it’s a personal preference.) Branding experts typically have a range of around five colors to use. I try to keep things simple and keep mine to just two colors. For this, I use Adobe Color CC (it’s a free tool) to get the complementary color of my chosen main color.
9. Start publishing
If you have never blogged or explored WordPress before, it might feel intimidating to start publishing your first blog post.
A fresh install of WordPress generates a first blog post and comment. You can start with this one – edit the current post and delete the comment.
As for creating a blog post from scratch, WordPress is really easy to navigate. Just go to your Dashboard which you can access via domainname.com/wp-admin, click on Posts and choose Add New. Type away and press publish.
Worry about the formatting and other stuff later – you finally have your first travel blog post from scratch – hooray!
10. Learn from the experts
Now that you’ve gone through the basics, it’s time to level up your game.
There are a gazillion courses about blogging out there, and choosing the best one is all up to you. You’d probably consider price, level of difficulty, or the teachers themselves.
Travel Blogging Courses:
- Travel Blogging Fast Track by It’s A Lovely Life
- The Business of Travel Blogging by Nomadic Matt
More Free and Paid Blogging Courses:
- FREE Traffic and Monetization Challenge by Lena Gott
- FREE 12-Day Blogging Bootcamp by Paul Scrivens
- Building a Framework Ebook by Just A Girl and Her Blog
- Income Journey Ebook by Suzi Whitford of Start A Mom Blog
- Busy Moms Building Course by Monica Froese
- Ready Set Blog Traffic by Elna Cain of Twins Mommy
That’s it.
Now, go forth and start that blog! And feel free to comment below or contact me if you have any questions.
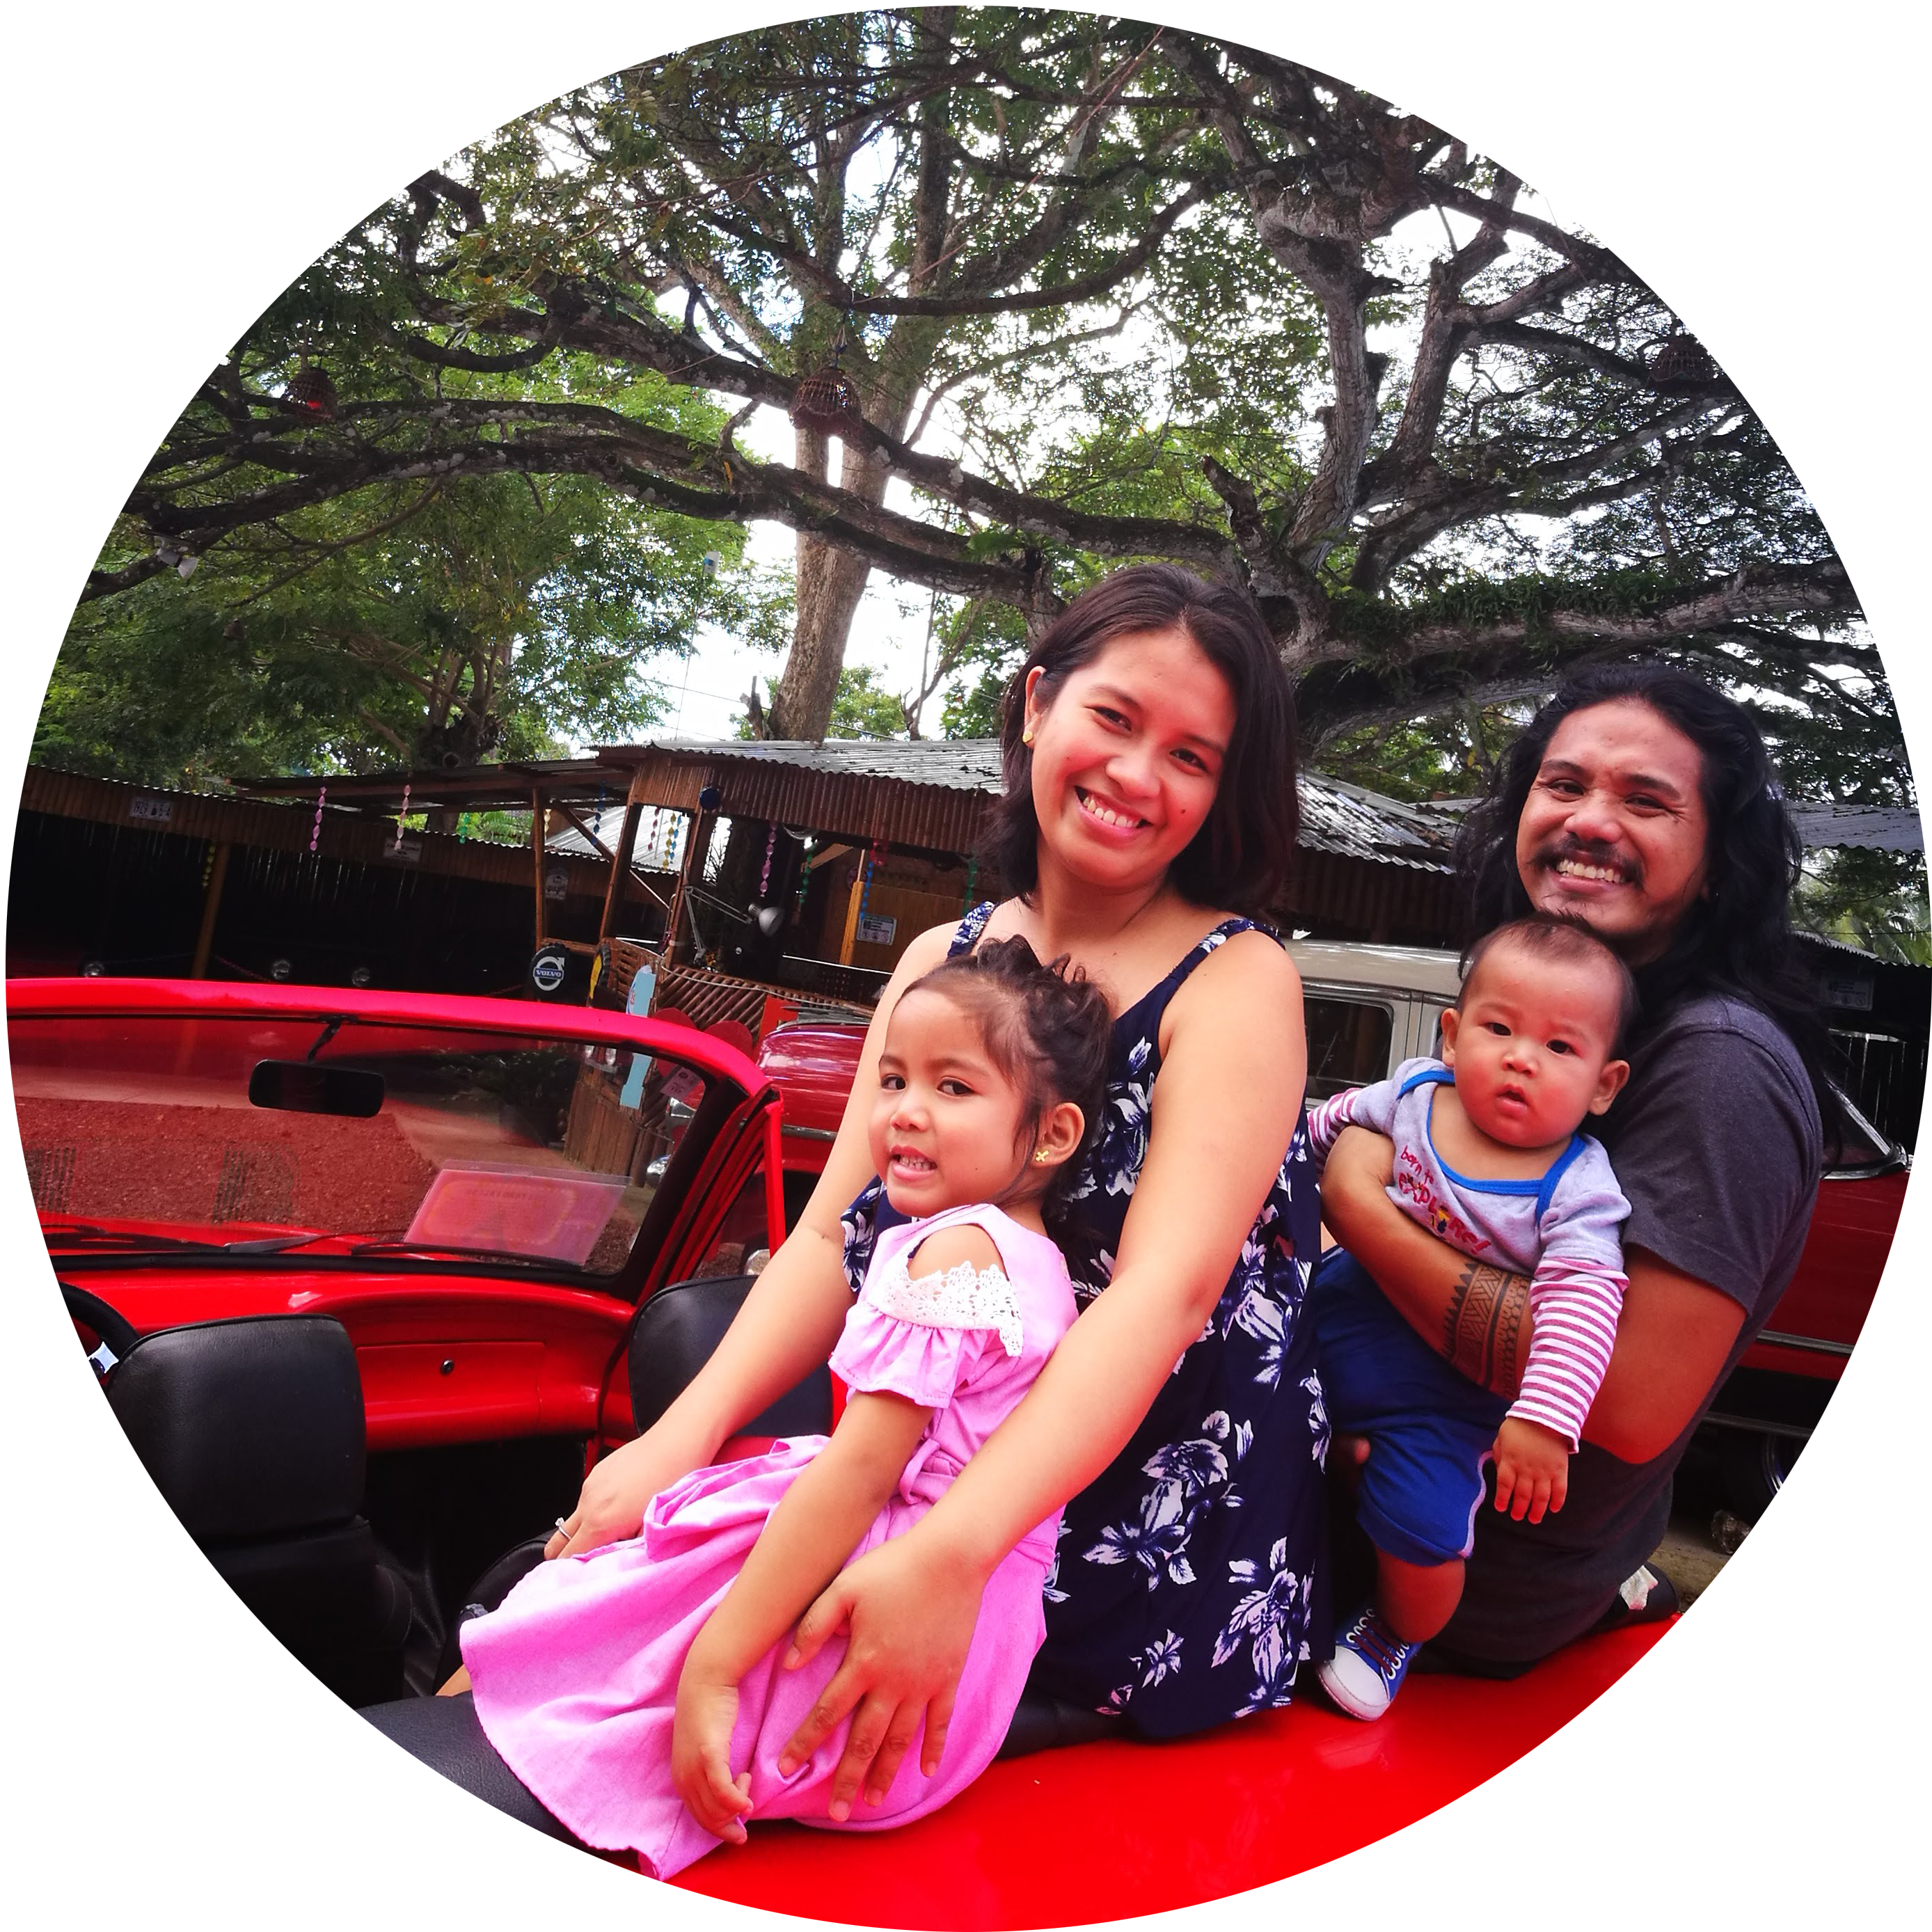
Oh, hello there!
Pam is an outdoors-loving millennial momma who loves to hike, trek and camp in the beaches and mountains with her partner and their kiddos. When not exploring the great outdoors, she works with bloggers, coaches and solopreneurs to free up their time so they can work on the things that they love and enjoy the most.